


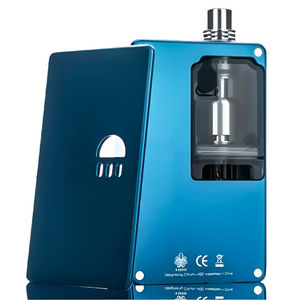


How to install premade or hand made vape coils: A Guide
|
|
Time to read 7 min
Our Vaper Level system makes it easier for you to find the right vape products for you. Each product page is tagged with a recommended experience level which is colour coded and easily recognisable. View out full guide to find out what level you are!

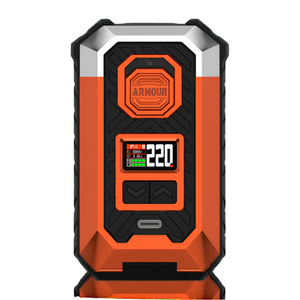
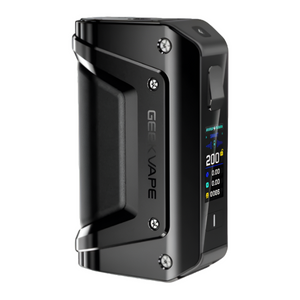
Absolute beginners looking for a simple device to make the switch from smoking.

Moderate experience with vaping, confidence: changing coils and requiring adjustable settings.

Experienced and knowledgeable vapers needing advanced features or rebuildables.


|
|
Time to read 7 min
Table of contents
Building an RDA. It sounds like something reserved for the tech-obsessed hobbyist hidden away in a shed, doesn’t it? Just shove some wire in a hole, add a bit of fluff, and you are ready to go. Except, no. That haphazard approach is a one-way ticket to a burnt tongue and a mouthful of metallic regret. But fear not, because learning how to install premade or hand made vape coils isn’t some mystical ritual. It is a methodical process that rewards patience with incredible flavour. If you follow the rules, you will transform your vaping experience from mediocre to magnificent.
The heart of your RDA is the coil. Whether you have spent your Sunday afternoon meticulously twisting strands of Kanthal or you have bought a fancy tub of Alien Claptons, the installation remains the crucial bridge between a great vape and a short circuit.
If you don't understand how to install premade or hand made vape coils, you are essentially guessing with electricity. Quality matters, but placement is everything. You could have the most expensive hand-crafted coil in the world, but if it isn’t seated correctly, it’s just an expensive paperweight.
Before you even touch a screwdriver, we must address the elephant in the room: electrical safety. It is absolutely paramount that you always check Ohm’s Law before firing your build. You must understand the relationship between voltage, resistance, and current to ensure you aren't overstressing your batteries. Always check the type of device you are using and verify if it can safely handle the specific Ohms your coil build will produce.
If you are ever in doubt, always use a regulated device with built-in safety protections rather than a mechanical mod.
Before we dive into the grime, you need the right gear. Attempting to build without the proper tools is like trying to fix a watch with a hammer. To master how to install premade or hand made vape coils, you will need:
Wire Clippers: Specifically for those precise, flush cuts against the post.
Screwdriver: Matching your RDA's post screws (usually Phillips, Flathead, or Hex).
Ceramic Tweezers: These are non-negotiable for pulsing your coils safely without shorting them.
Ohm Reader: Your primary safety net against electrical mishaps and short circuits.
Organic Cotton: The delivery system for your liquid gold, preferably unbleached.
Scissors: Sharp ones to ensure you don't compress the cotton fibres while cutting.
The first step in how to install premade or hand made vape coils starts with hygiene. If you are reusing an old RDA, give it a thorough scrub. Use warm water and avoid soap at all costs. Soap residue is the enemy of flavour, and inhaling bubbles is a far cry from the strawberry custard you were expecting. Once the deck is sparkling and bone dry, you are ready to begin the assembly.
Take your coils and look at the legs. These need to slide into the post holes on your deck. The trick here is alignment. You want the coil to sit centrally over the airflow holes. If the coil is too high, you’ll get a hot vape; too low, and you risk a short against the deck. Learning how to install premade or hand made vape coils requires a bit of spatial awareness. Don't worry if it looks wonky at first; we will fix the alignment once the screws are tightened.
Once the legs are in the posts, use your screwdriver to tighten them. You want them firm but not so tight that you snap the wire. A secure connection is vital for a stable resistance reading. If the screws are loose, your Ohms will jump around like a toddler on a sugar rush, which is dangerous for your battery. This is a fundamental part of how to install premade or hand made vape coils that many beginners rush through.
Now comes the satisfying part. Use your wire clippers to trim the excess wire from the legs. You must get these cuts as flush to the post as possible. A stray bit of wire touching the outer cap of the RDA will cause a short circuit. If you want to know how to install premade or hand made vape coils like a pro, you must be meticulous with your trimming. Double-check that no tiny shards of metal have fallen onto the deck.
Place your RDA on an Ohm reader. This is the moment of truth. If you are using a dual-coil setup, your resistance should be exactly half of what a single coil would be. For example, two 0.4 Ohm coils should read as 0.2 Ohms. Understanding how to install premade or hand made vape coils involves basic physics. If the reading is wildly different from what was advertised on the box, check your screws and look for shorts.
This is where the magic happens. Put your RDA on your mod at a low wattage. Give it a few short pulses. You’ll likely see "hot spots"—bright orange lines that glow faster than the rest of the coil. Use your ceramic tweezers to gently pinch the coil or "strum" the wraps like a guitar string. When you have mastered how to install premade or hand made vape coils, they will glow evenly from the inside out. Never use metal tweezers while firing, or you’ll see some very unwelcome sparks.
Now for the cotton. Cut a strip that is thick enough to feel some resistance when pulled through the coil, but not so thick that it deforms the wire. Twist one end, thread it through, and then trim the ends so they just touch the bottom of the juice well. A common mistake in how to install premade or hand made vape coils is using too much cotton, which chokes the juice flow and leads to the dreaded dry hit. Fluff the ends out with your tweezers to encourage capillary action.
Do not just put the cap on and fire it. You need to "prime" the wick. Drip your e-liquid directly onto the cotton and the coils until they are fully saturated. Let it sit for a minute. The final step in how to install premade or hand made vape coils is patience. Once the cotton has soaked up the juice, give it a quick test fire. You should see a clean plume of vapour and hear a satisfying sizzle.
This depends on your level of patience. Premade coils are convenient and generally consistent. However, hand-crafted coils from specialist builders often use higher-quality wire and complex weaves like Aliens or Fraliens, which provide a much larger surface area. If you want the absolute best flavour, hand-made is the way to go, but the process of how to install premade or hand made vape coils remains largely the same for both. Here are the pros of each:
Premade Coils: Cheaper, faster to install, and widely available in most vape shops.
Hand Made Coils: Superior flavour, better longevity, and crafted with enthusiast-grade materials.
Both Types: Require the same level of care when checking for shorts and hot spots.
If your build isn't performing quite right after learning how to install premade or hand made vape coils, check these common culprits:
Jumping Resistance: Usually caused by loose post screws or a leg that hasn't been trimmed flush.
Muted Flavour: Often the result of too much cotton or the coil being positioned too far from the airflow.
Spitback: Can occur if the wattage is too low for the coil mass or if the cotton is too thin inside the coil.
Dry Hits: Usually means the cotton is packed too tightly in the juice wells, preventing liquid flow.
There is no "perfect" wattage, but a good rule of thumb is to start low. If your build is 0.2 Ohms, start at 40 watts and work your way up until you find the "sweet spot" where the flavour is dense and the vapour is warm. Finding the right power level is the final piece of the puzzle once you know how to install premade or hand made vape coils.
Mastering the RDA is a journey. Your first few builds might be a bit messy, and you might accidentally singe a bit of cotton, but keep at it. The difference in flavour compared to a standard sub-ohm tank is night and day. By learning how to install premade or hand made vape coils, you are taking control of your vaping experience. You aren't just a consumer anymore; you are a builder. And there is nothing quite as satisfying as a perfect vape that you created with your own two hands.
Always remember to prioritise safety. Use high-quality batteries, check your Ohms, and never ignore a "short circuit" warning on your mod. Now that you have the knowledge of how to install premade or hand made vape coils, it is time to get building and enjoy the clouds. Happy vaping!


